This is a guest post from George to provide details regarding the latest installation activities regarding our quest for solar power for Breeze On. As the winter weather ended here in MD, I was finally able to remove the shrink wrap from Breeze On. Yeah...Spring is finally here.
Once we had access to the boat, I installed the bimini. My friend and chief consultant on this project, Ray and I then dry fit the solar panels on the bimini top.

During this process we decided that it would be better to turn the panels 90 degrees from the way they show in the picture above and add another bow or stainless steel bar for additional support between the panels. Our concern was that the bimini might flex too much in windy conditions with only the front and back supports. I contacted the local sail & canvas guy and he reluctantly agreed to do the job - they are very busy now, as you can imagine. It sounded like it would take them a week or two to get the 1" stainless tubing and bend the bow.
With the support on order, Ray and I set out to find the perfect location for the Blue Sky 2000E controllers. The controllers each have a display that shows battery charge, solar panel output and charge input to the battery banks. Our thought was that panels needed to be somewhere visible so they could be checked occasionally but they probably didn't need to be where they could be seen at a glance any time. We also wanted them as close to the battery bank as possible. After looking at different possibilities, we decided to install the controllers next to each other inside the compartment that is above the nav station. There was plenty of space behind this locker for the controllers to sit when mounted flush to the back of the locker. We positioned them at the top of the compartment so that they would be visible when things were stored below them.
We removed the back of the compartment and used Ray's oscillating multi-tool (have I mentioned that Ray has some nifty tools?) to cut the openings for each panel. Once the openings were cut and smoothed with a file we attached the controllers. We wired both controllers to the battery bank, with a 30 amp in-line fuse on each of the the positive leads.

Wanting to see the fruits of our labor, we wired one solar panel to one controller. We just ran the wires for the solar panel out the companionway for this test. Then we reinstalled the back of the locker with the panels. A final check of the wiring before plugging in the solar panel revealed that I had been confused by the way Renogy labels the + and - on their extension wires. The one marked minus actually plugged into the positive output of the solar panel. We then had the pleasure of removing the back of the locker again in order to change the two leads.
Finally all was ready and I plugged in the solar panel. Have I mentioned that it was a VERY cloudy day? That said...this is what we saw...
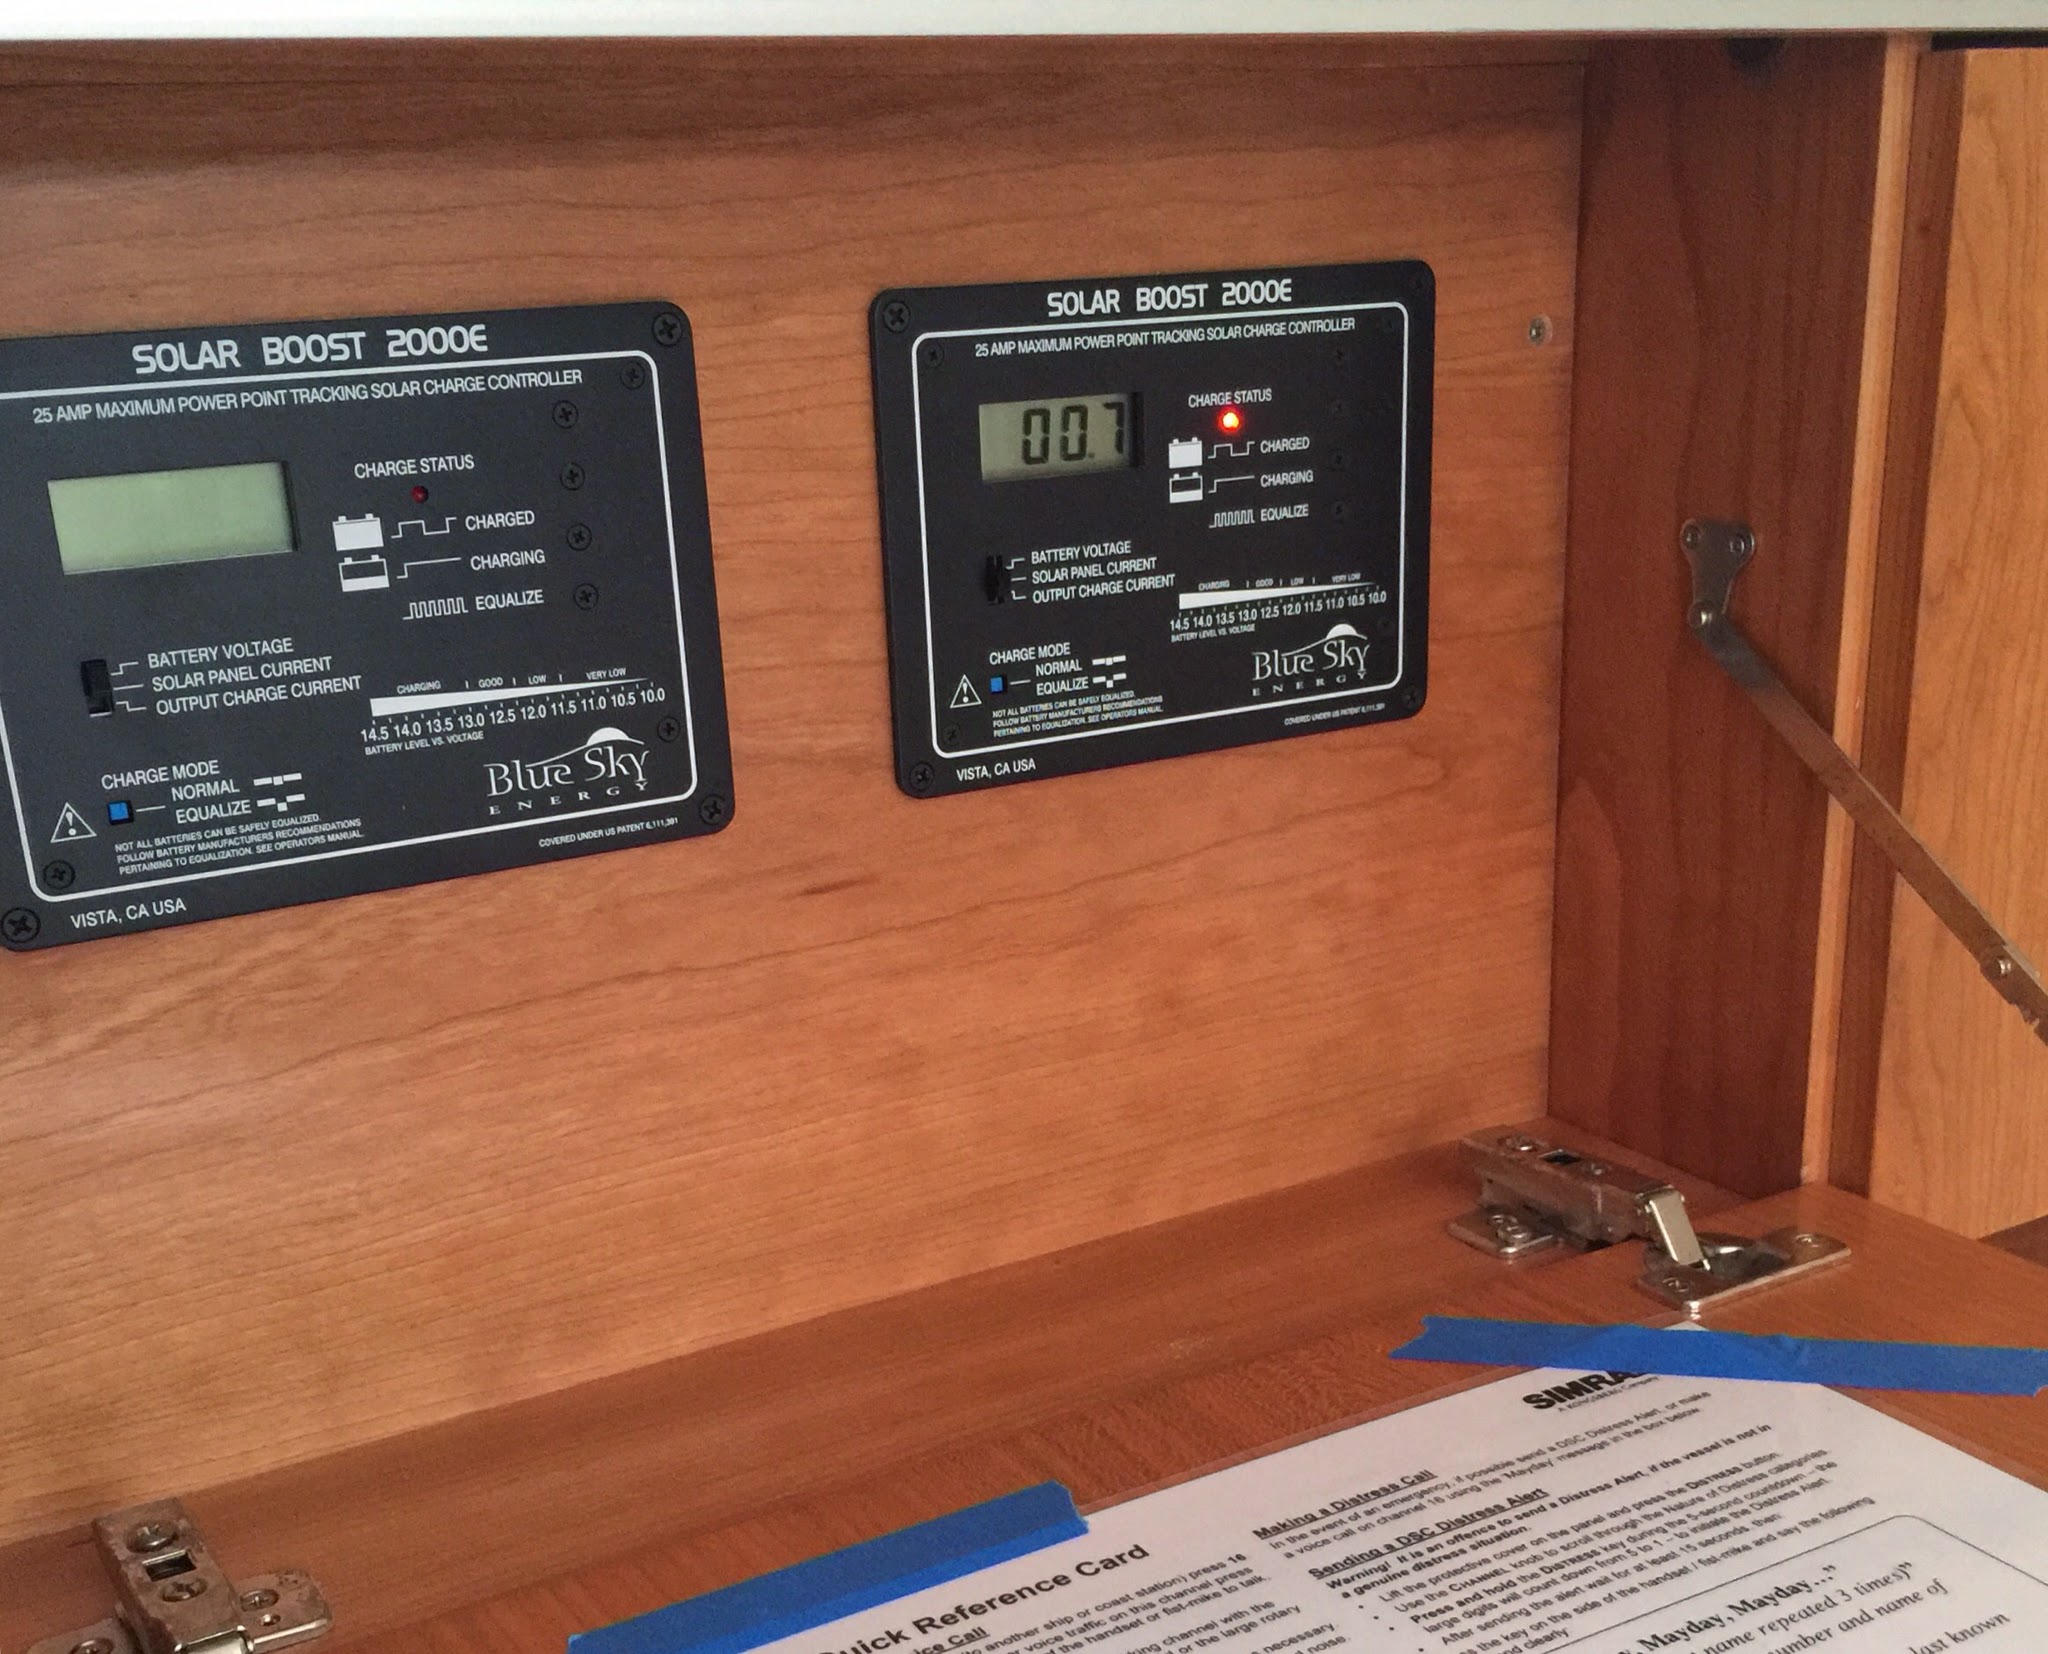
We have solar power but not much because of the clouds and the fact that we were only using one panel. I checked the input/output on the next sunny day and things looked much brighter.

And our "smart" controller was indeed smart, it was adjusting the voltage to increase the amperage going into the battery bank. There was about a 1.0 - 1.2 increase in amps out to the battery versus what was going into the controller.
A few days later, while I was polishing Breeze On's top sides, the canvas folks showed up to take one of the existing bows as a pattern for the new one. Later that afternoon (yes, I was still there polishing) they came back with the new bow! I recruited Ray's help again the next day and we determined the final length of the bow, since the canvas shop had purposely made it long. We measure twice (probably more like four times) discussed whether we wanted to cut "on the line" or go a little long "just in case". We cut "on the line" and the bow fit perfectly.

We had two panels with us and used them to determine the location of each panel. Ray is using Bev's chalk marker to mark the edges.
 I
IBev and her trusty Husqvarna sewing machine then went to work. She installed a "rub strip" of canvas on top of the bimini where the new bow fits, just in case the boom ever gets low enough to hit the bimini. Then she sewed each of the lapels onto the bimini - 8 long ones and 8 shorter ones, each with a layer bimini canvas, 2 layers of lapel canvas and then Velcro.

The sewing machine got plenty of rest stops to avoid overheating! Cramming all the canvas into the sewing machine was quite a challenge.
The end product looks like this:

The lapels aren't attached to the top of the panels in this picture because the 3M 5200 adhesive I used to attach the Velcro hasn't fully cured yet but everything looks like it will fit.

So...we are getting closer to the end of this project, finally. The next step will be to install the wiring for the panels. We plan to run the wires down the outside of the port back stay, through the aft locker on the port side, and through the bowels of the ship on the port side to the controllers. We already have a pilot line snaked through most of this path. Stay tuned for what I hope will be the final installment to this saga!
I really thank you for the valuable info on this great subject and look forward to more great posts. Thanks a lot for enjoying this beauty article with me. I am appreciating it very much! Looking forward to another great article. Good luck to the author! All the best!
ReplyDeletecamping solar panels